¶ Validation
We have two types of validation rules.
- Rules for validating the data entered in the order (checking the correctness of entering the full name, phone number or email, etc.)
- Rules for moving orders by status (to prevent order to move from “Spam” status right to to “Paid” status, etc.)
¶ Data validation in the order
It is in the Management - Validation
Order validators - are rules for filling in data in orders. For example, the “Phone” field must be filled in or be filled in according to a certain format. The page, like other sections, displays a table with already created validators.
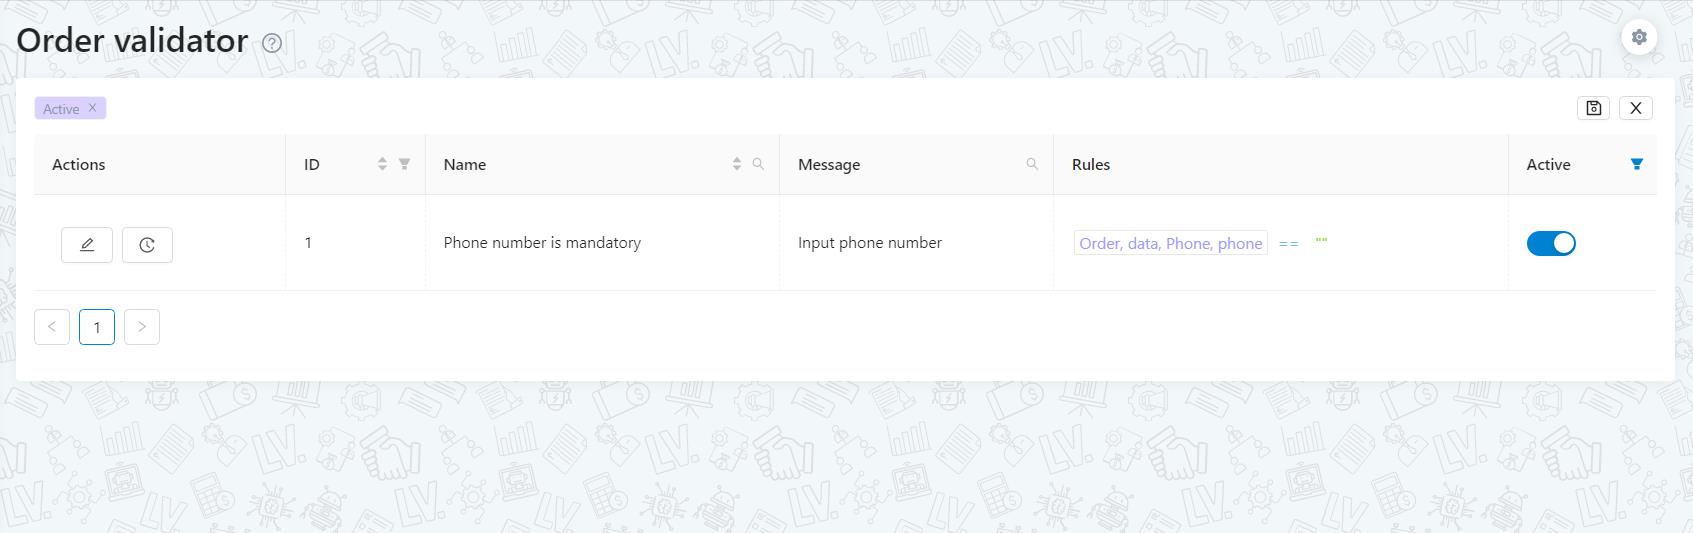
Note:
- the name of the validator - is necessary for your convenience when working with the list of validators
- message - here you input the text that will be displayed to the user if the validation rule is violated. For example, you added a validator for the required field “Phone” and the user saves the order with an empty phone, and sees a clear message “Phone number is required”;
To create a validator, you need to click on "+" sign button at the bottom of the page. A window will open with a title and message. And then you need to write the validation rule.
“Rule”, is the part which shows how exactly the validator will work
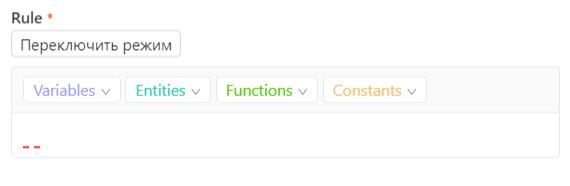
We have our own low-code editor for creating validation rules. The same editor is also used in creating triggers.
However, you can always contact our technical support for we help you to create validation rules. If you want to create validation rules yourself, we will provide you instructions.
¶ Order move rules by status
It is in the Management - Movement rules
Movement rules are the rules by which orders should be moved to statuses. Here specifies the movement algorithm so company's' employees cannot make incorrect order movements.
For example, we have a company that has the statuses “Processing”, “Accepted”, “Cancelled”, “Sent”, “Paid”, “Return”, “Spam”. And we don’t want employees to be able to move orders from “Processing” right to “Paid” status, since “Processing” stores new orders that have not yet been processed, and “Paid” will store those orders for customers who have already sent the goods and they redeemed it at the post office.
Without movement rules, an employee will be able to complete such a move, which can cause a number of problems. Therefore, to prevent such situations from happening, you need to configure the rules for moving.
This is how settings page looks like, it is very simple, but it needs to be understood correctly. To figure out with the setup, let's start with the list in the middle.
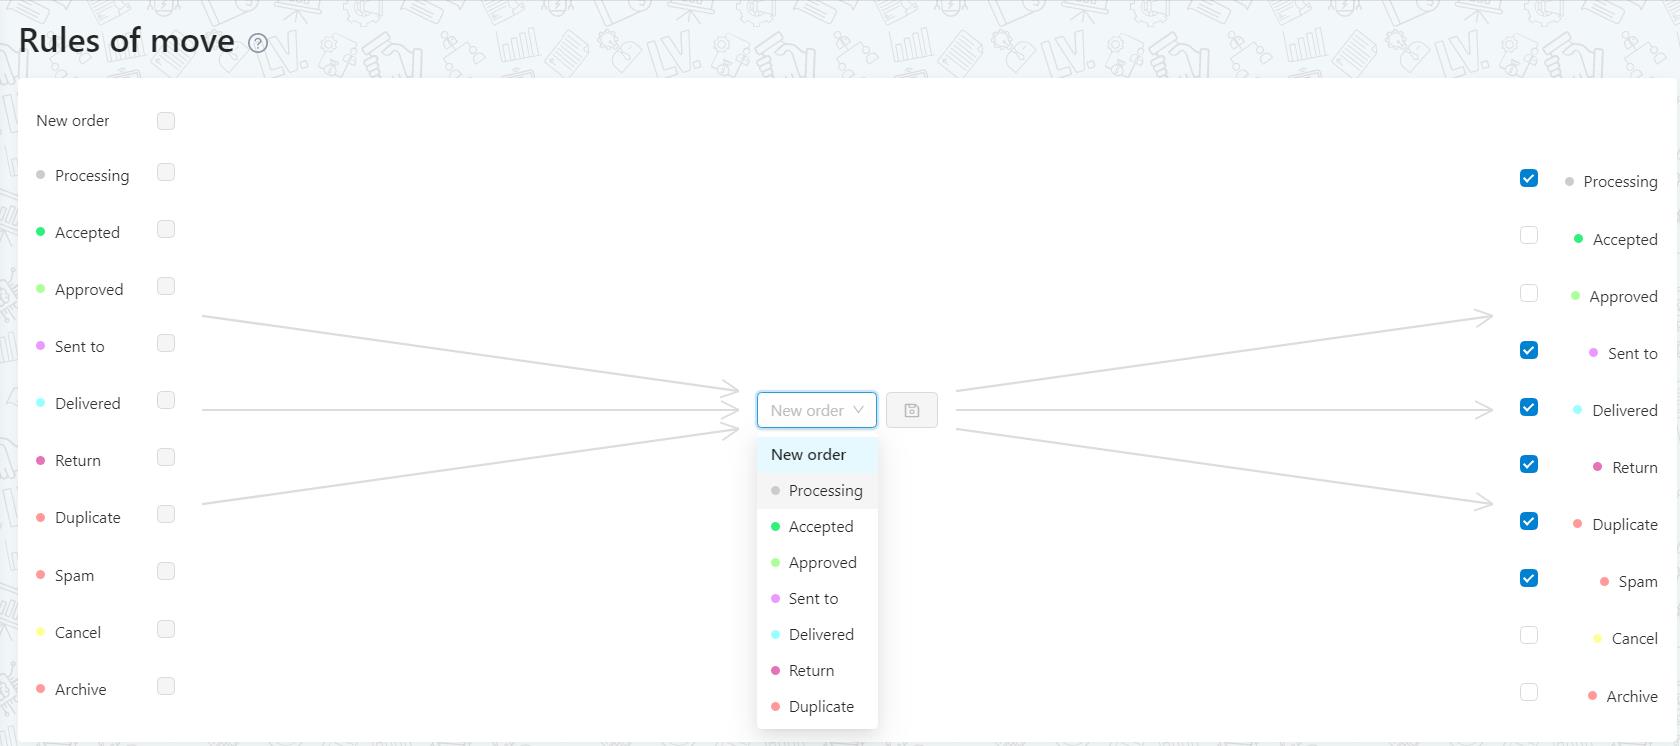
Here you need to select each status in order and set up rules with columns on the left and right. Let's start with the "Processing" status.
Left column is a list of statuses, FROM which the order can move to the “Processing” status (which is selected in the middle)
Right column is a list of statuses that an order can move from the “Processing” status (which is selected in the middle)
Once again at the screenshot with hints
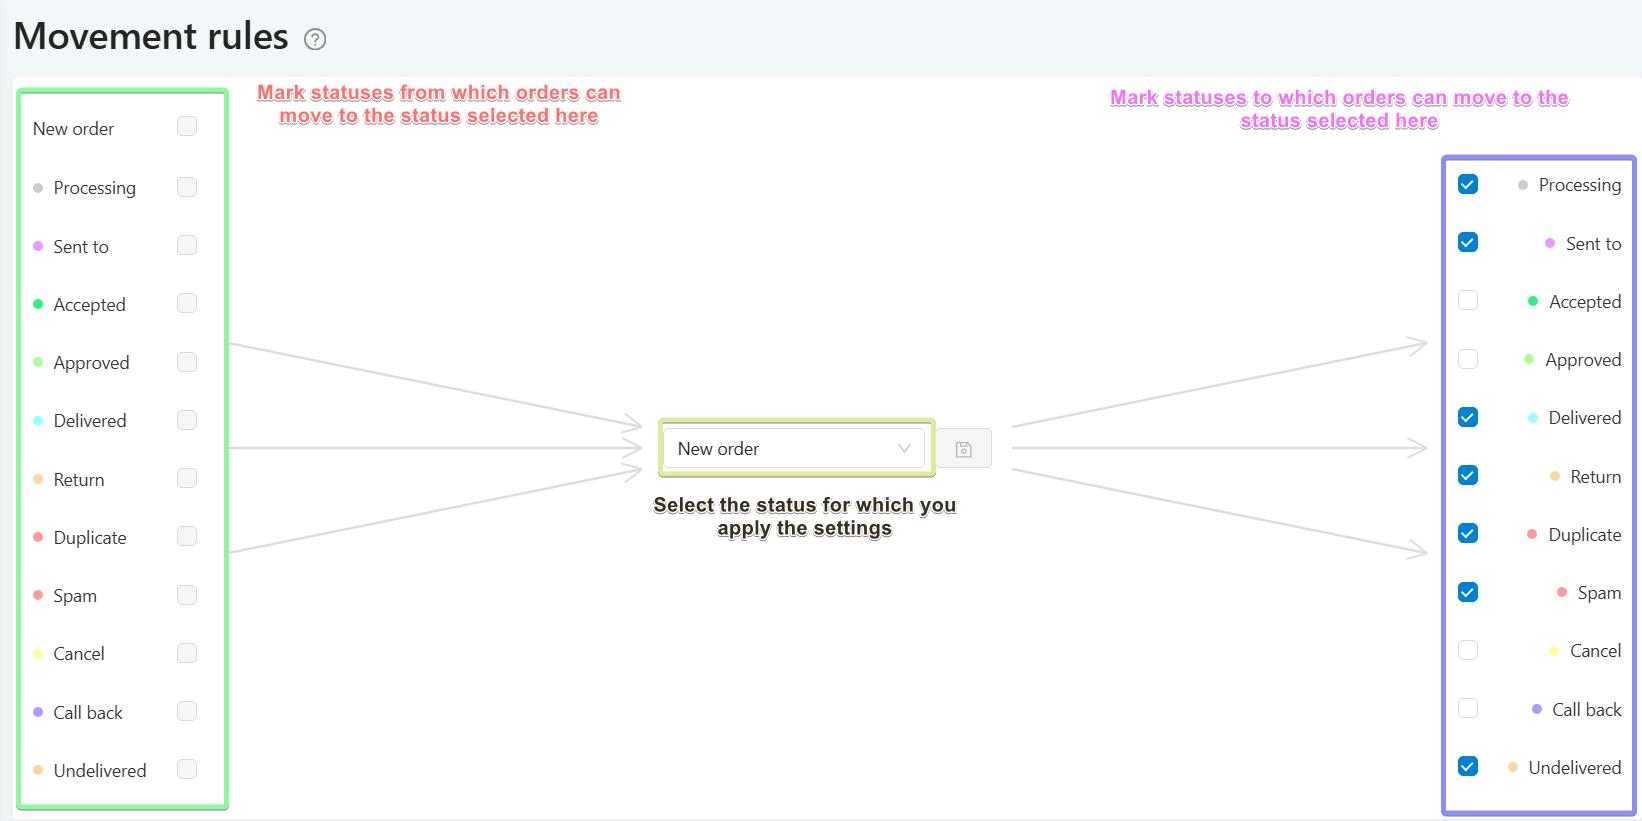
Note: pay attention that in the middle you can select not only statuses but also “New order”. This is necessary so that we can set the status in which new orders can be created. By choosing “New order”, you can only set the column on the right, which shows statuses to which the new order can come to. It is not necessary to set up which statuses it can come from, because this is a new order.